
Mushrooms take a minimum of three days to make. The first day involves form construction and a light first layer of concrete. The second day, adhesive and fortifier are applied and a second layer of concrete is added. The third day is the finishing day. It is heavy, messy work!

Tools
- wheelbarrow and hoe to mix cement; water source
- plastic buckets for measuring playground sand, Quikcrete commercial
- acrylic fortifier, concrete bonding adhesive (glue to help the concrete adhere)
- old paintbrush; wooden paint stir stick
- table covered in plastic; garbage bags or plastic sheeting to protect table and cover statues
- tin snips; roll of 1/2 or 1/4 inch metal mesh
- cardboard tube for stem and recycled plastic lid or cardboard disc to put on top of tube beneath metal mesh
- twist ties
- disposable gloves
- stone stamps to sign your mushroom
 |
| Bonding adhesive and acrylic fortifier |


 |
| 1/2 inch metal mesh, cardboard tube, plastic topper and twist ties |
Concrete mix
3 parts playground sand, 1 part Quikcrete (Type S commercial)/ Portland cement, 1/2 part water
Day 1
Mix your cement in a wheelbarrow using a hoe and by dragging the dry ingredients from one side to the other side in rows (by this I mean do not pull it all at once). Hoe edge to edge three times. Add the water to the dry mix in three parts, mixing 1/3 of the dry mix in with the water before adding more water. Slow and steady. If you see a lot of water pooling at the side of the wheelbarrow, it's too wet and you will have to add additional sand and Quikcrete.
Put your base on top of the table (keep in mind that once you have added all the concrete to it, it has to be covered with a garbage bag and remain in place to cure for 24 hours).
Estimate how much metal mesh you will need to wrap around your base, ensuring that there is a minimum one-inch overlap. Cut your metal mesh by standing on it and being very careful. It's sharp. secure the edges with twist ties, using the candy cane method (shape twist tie into a candy cane shape to easily feed it through the mesh). Place a plastic lid on top and fold over and secure the mesh.


Estimate how much mesh you will need for the cap of your mushroom.

Count down approximately 8 squares from each side and cut in the same number of squares:
 |
| mesh has been enlarged for a quick drawing |
Fold on top and secure with twist ties. Do this for all four corners. You will shape your mushroom by placing it cap-side down on the ground and stepping inside the corners to soften the edges. You can also pick it up and roll it inwards to form a smooth shape. Think of an umbrella.
You are ready to start applying cement to the stem and then the cap. Grab a big handful of cement and begin at the base of the stem. Press it onto the very bottom of the stem, using firm pressure, and drag it upwards toward the top:
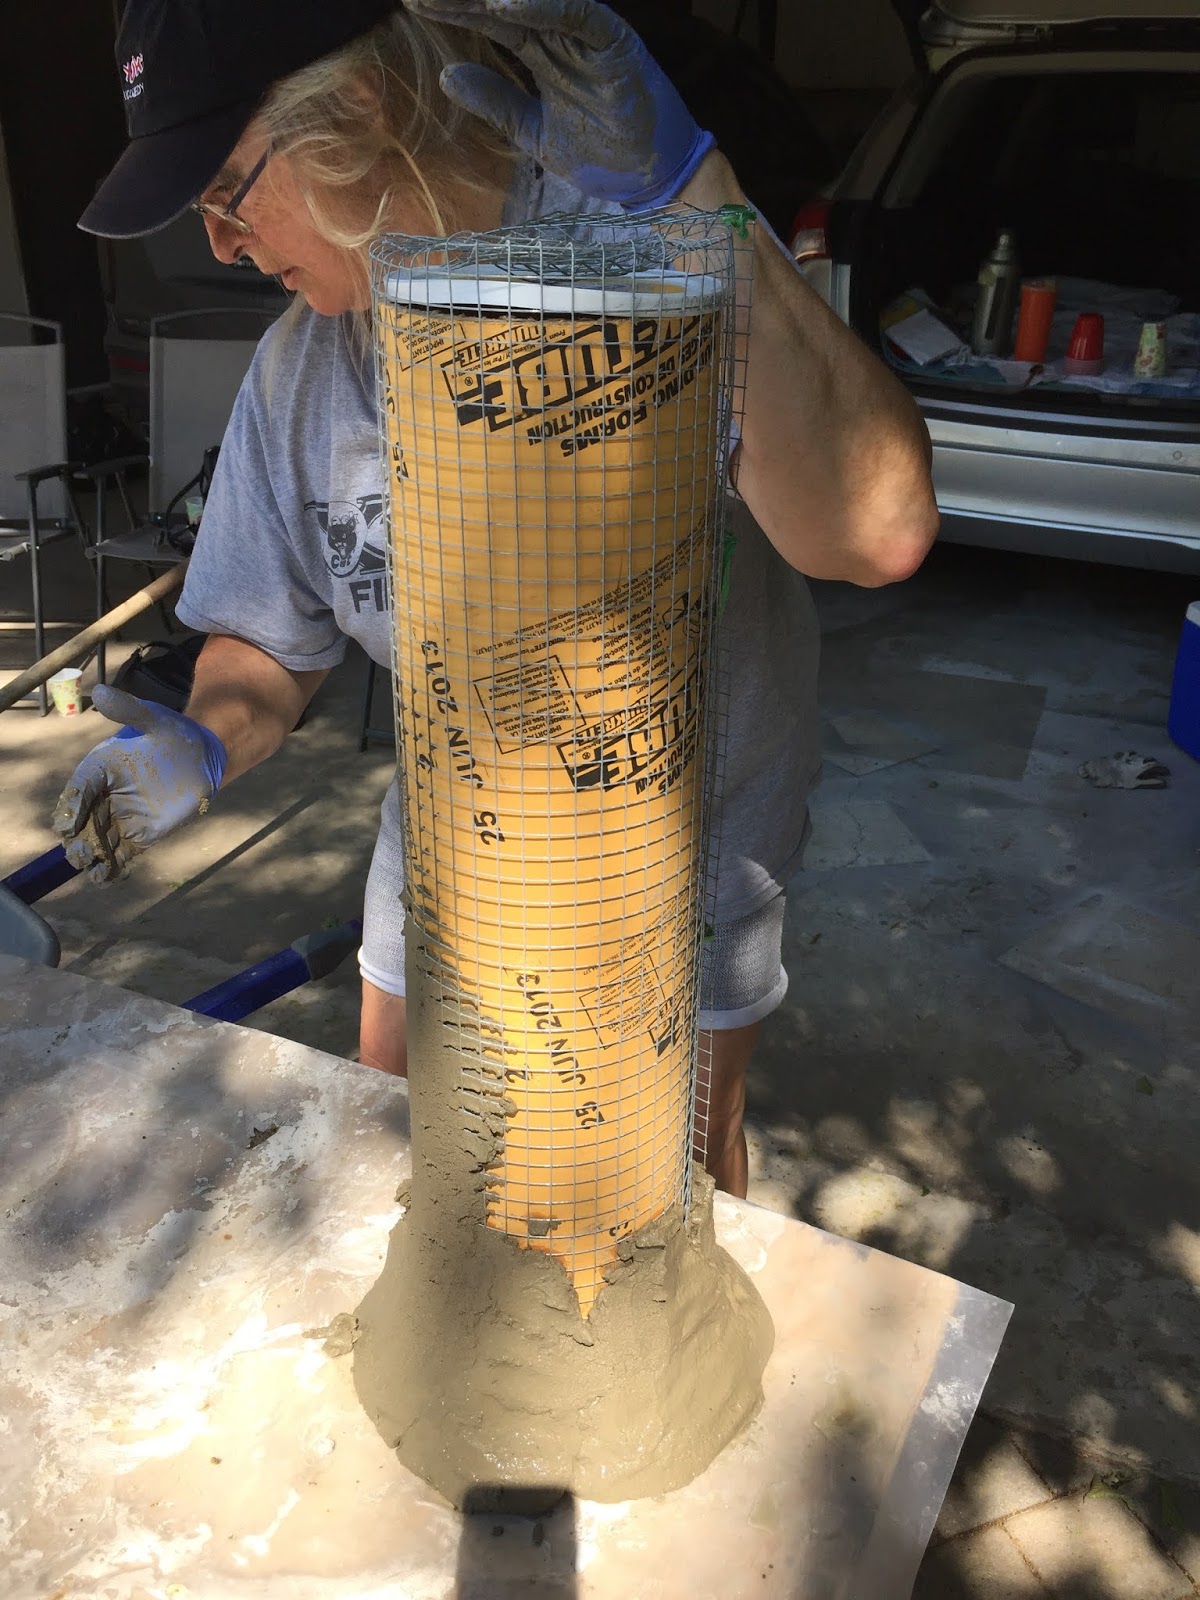
Don't drag the cement down as it does not adhere to the base. Keep doing this - grabbing gobs of cement and dragging upwards - and work your way around the stem. Don't worry about whether it looks pretty. The idea is to cover the wire as much as you can the first day. The cement will slide down a bit, making the very bottom of the stem wider. This is desirable as it looks more natural. Once the sides are covered, grab another gob and cover the top of the stem. Cover the base with a garbage bag and allow to cure for a minimum of 24 hours.
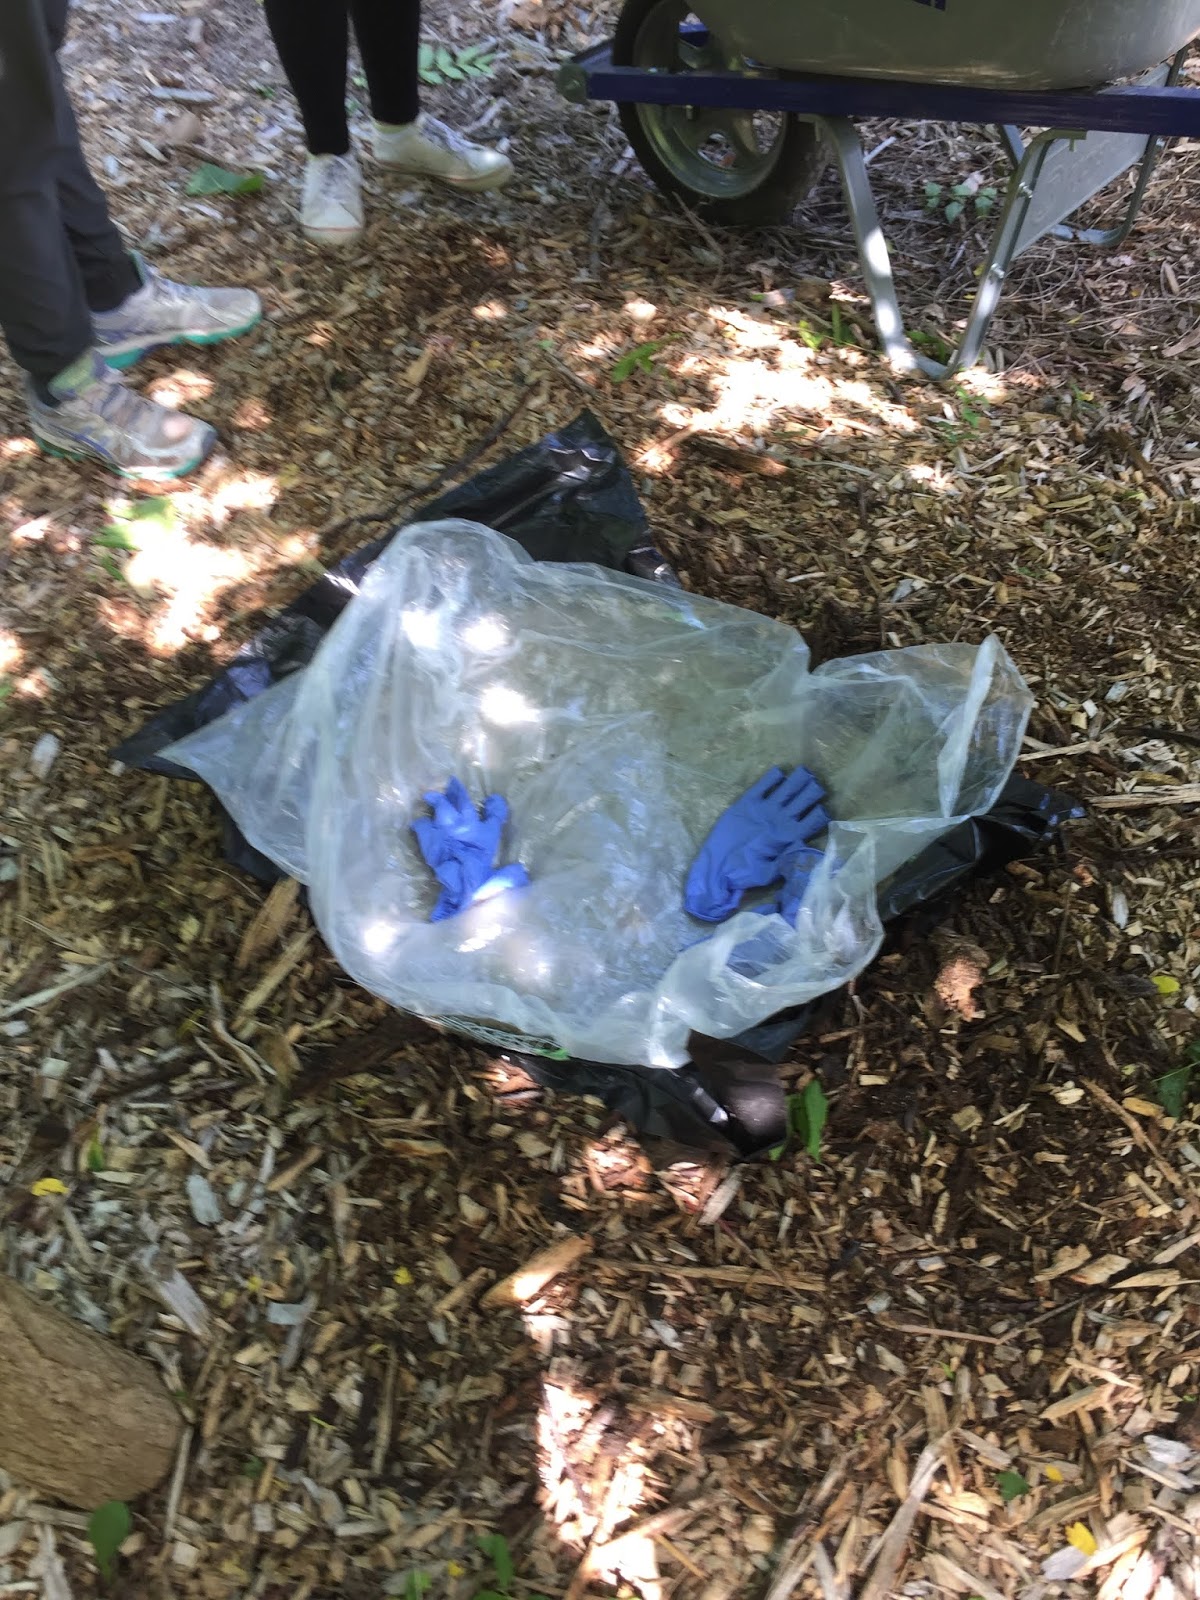
Dig a depression in the garden, in mulch if possible. Line it with a plastic bag. Place your mushroom cap-side down in the hollow. Shore up the sides with mulch to form a firm "mold".

Grab handfuls of cement and toss them into the cap, patting it down to make a layer that measures approximately 1/2 an inch tall. Cover all of the exposed mesh with the cement.

Cover the cap with a plastic bag and weigh it down with something light (the gloves). If you want to add gills on the underside of the cap (optional), return in 2-3 hours and do so. Let it cure for a minimum of 24 hours.
Clean up! You've finished Day 1. Rest. :-)
Day 2
The big reveal:


Today is the day to add more cement, but first you have to wet your mushroom pieces with water and apply glue and fortifier.
Make a slurry with cement powder and acrylic fortifier to the consistency of pancake batter (two cups of cement to a cup of fortifier). Use a paint stir stick to mix.
Mix up your cement, but make only half the amount you made on Day 1.
Spray your mushroom pieces with water.

Apply the glue to all parts of the mushroom that you intend to cover with additional cement. You can paint it on quickly, slapdash. Apply the slurry but only where you intend to add additional cement. Make sure it gets into all the nooks and crannies, and apply more carefully. Thin it with water if necessary.
Now is the time to add more cement the same way you did on Day 1. 1/4 - 1/2 inch thick. Today you will be shoring up the sides of the mushroom, covering all of the wire, and refining the base. The work on the cap is done cap-side down on the table, not on the ground. Apply "balls" of cement around the top of the underside of the cap.
 |
| Stamping my initials. This picture also shows the "balls" of cement on the underside of the cap |
Let them rest for about 20 minutes and then smooth them out with your fingertips, very gently. It takes very little pressure.
Day 3
Today is the day to refine your work.

This particular mushroom had cured on the ground for a couple of weeks and was quite gnarly-looking. Irene used a hammer to whack off the undesirable bits.
Repeat all of the steps that you did on Day 2, but today pay special attention to smoothing out the cap and base.


Once you have finished smoothing and refining your mushroom, wait for 20 - 30 minutes before covering (plastic bags can leave marks). Wait for a minimum of 24 hours.
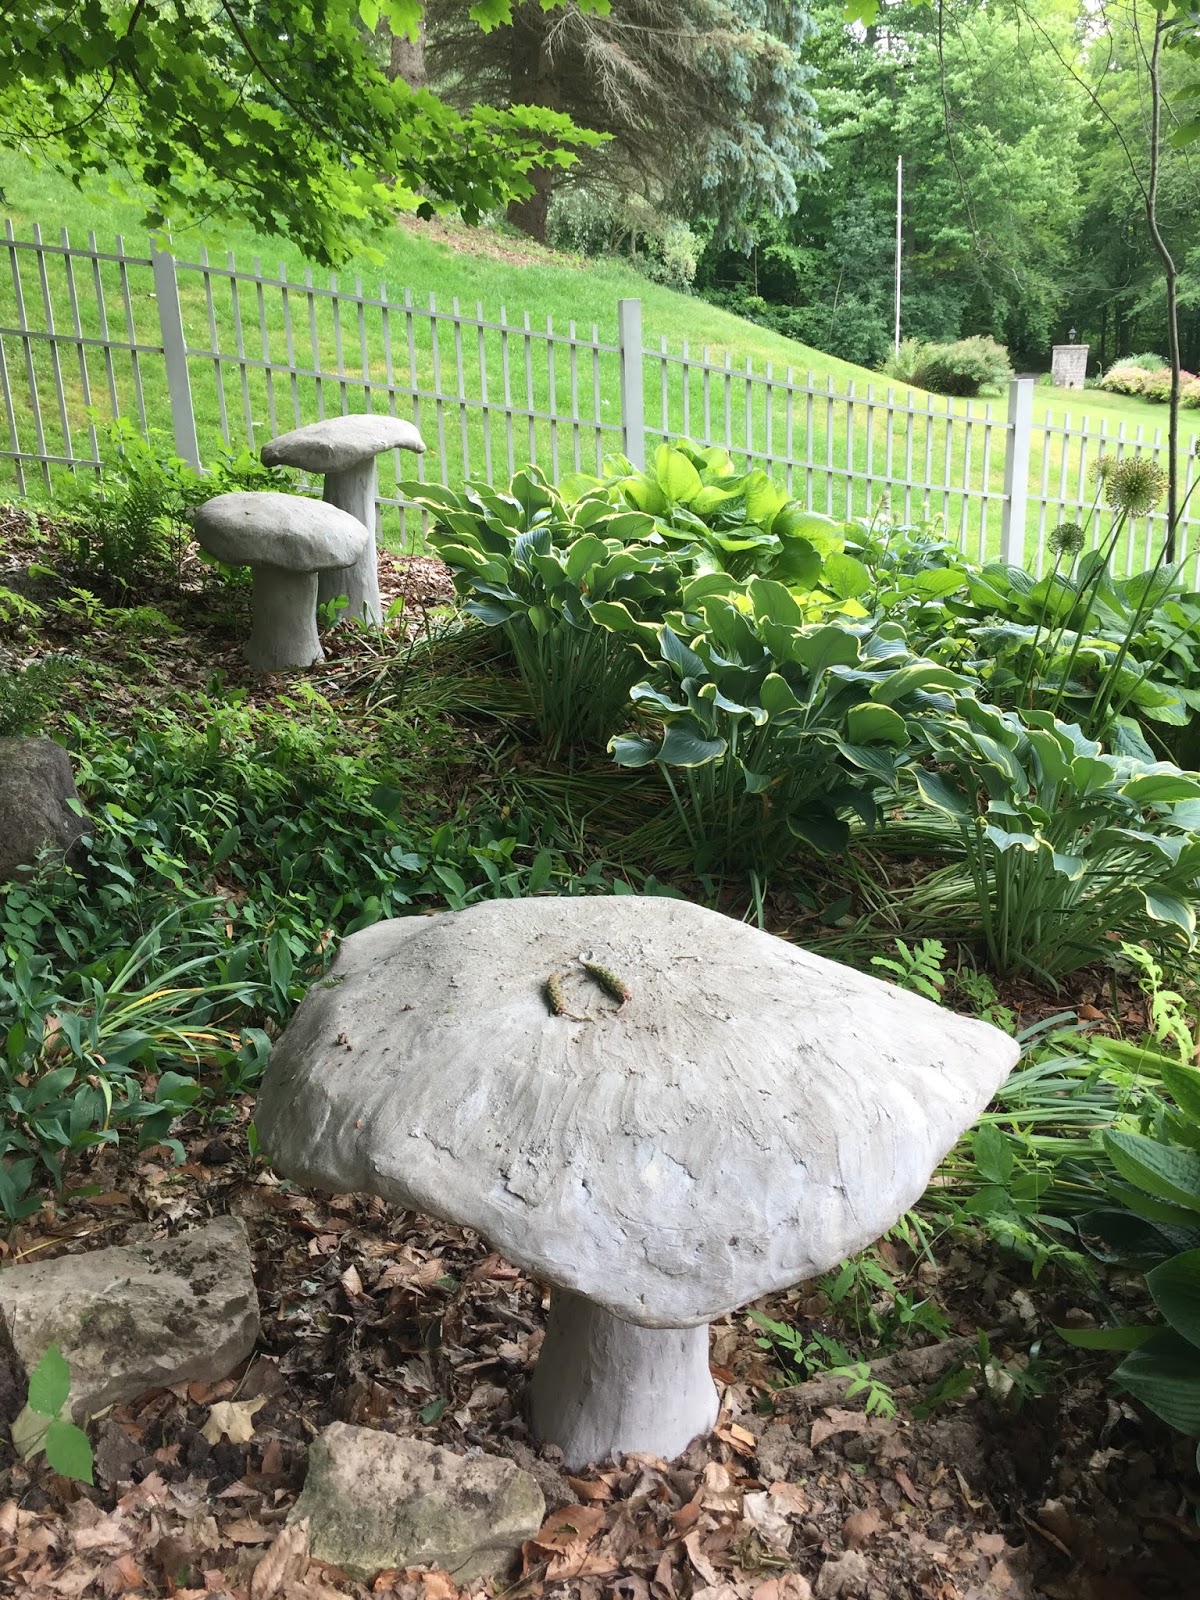
Tada!


Tips
Watch your hands as the cut metal mesh is sharp
Use recycled materials like plastic jugs or stacks of plant pots as bases.
Form your twist tie in the shape of a candy cane to easily feed it through the mesh
Make the mushrooms in the months of May - September. Temperature must be above 10 degrees
Once you have opened a bag of concrete, store the bag in a tied plastic bag to keep out humidity
 |
| A great book! |
Looking forward to trying this next!
Needle felting mushrooms: https://www.youtube.com/watch?v=n5mH6GENQeU
And this:
https://www.youtube.com/watch?v=eAjSsHV8EfE